Running a Facebook group is a way to build a community and market your blog or business. But you’re wondering how to start a Facebook group for your blog – because you know you need it to take your site or business to the next level.
If you’ve checked out any successful Facebook groups in your niche, you know they can be a great place to get discovered.
For many small businesses and bloggers, a Facebook group is the perfect marketing tool.
But you’ve got to start somewhere, and this post is all about doing just that.
At the end of reading this post, you’ll be ready to create a Facebook group that’s perfect for your niche readers.
You’ll be ready to start growing your community and your blog/business!
DISCLOSURE: This post contains affiliate links, meaning if you click on a product or service, and decide to purchase it, I may receive a commission at no extra cost to you. All recommended products and services are based on my positive experience with them. For more information, please read my Disclaimer.
Bookmark this post for future reference on Pinterest.

What Is A Facebook Group?
Unlike a Facebook page, a Facebook Group page is where you build a community to foster discussions among group members.
They are also a marketing tool for you because:
- You set the discussion points, putting you in the position of a niche expert
- You can promote your content, lead magnets and digital products
- You can promote yourself as a service provider
The benefit of Facebook groups is that they can be private, meaning you can keep conversations from the public eye.
You can also add members at your own discretion.
For example, in my Facebook group – The Blog It Better Society – I have a series of membership questions which allow me to select legitimately interested members from those who will not follow the group rules.
That’s another important thing: your Facebook group can have rules that you set.
If a member isn’t following them, you can remove them from your group.
How To Start A Facebook Group – Step-By-Step
We’ll look at how to start a Facebook group – the technical steps and also the details for specifically creating a Facebook group for your blog or business.
First, you need to get the blank Facebook group started.
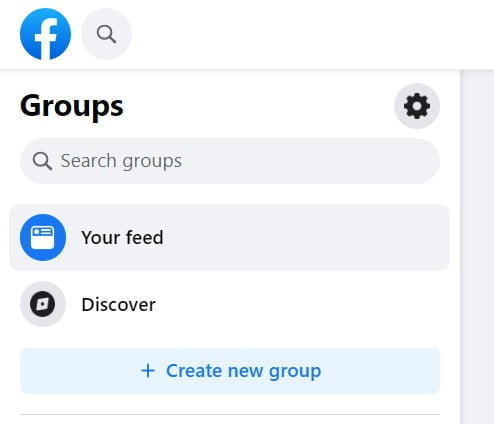
- From your main timeline page, look to the list on the left and click “Groups”. You’ll end up on your “Group Feeds” page.
- Click on “Create a new Group”

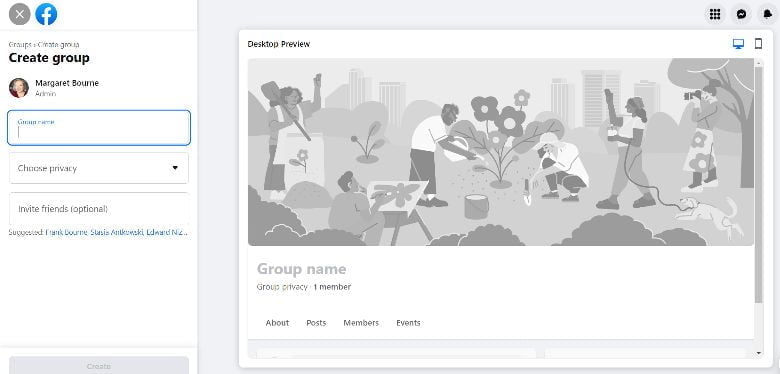
- Next, you need to create a Facebook group name and choose the privacy level. Don’t worry about the official name. You can still change it before you launch.

These are the basic first steps.
Now we have to look at the specifics for your Facebook group that are refined and specific for your goals and niche.
Planning And Setting Up Your Facebook Group
I started my Facebook group – The Blog It Better Society – by researching other groups and creating a plan.
To start a Facebook group, here are the key steps to take:
- Define the group’s purpose – what is it meant to do for group members? For your blog/business?
- Define your ideal group member. It should align with your blog or business target audience or customer.
- Choose a name that relates to your topic and includes a keyword that people would use when searching Facebook groups.
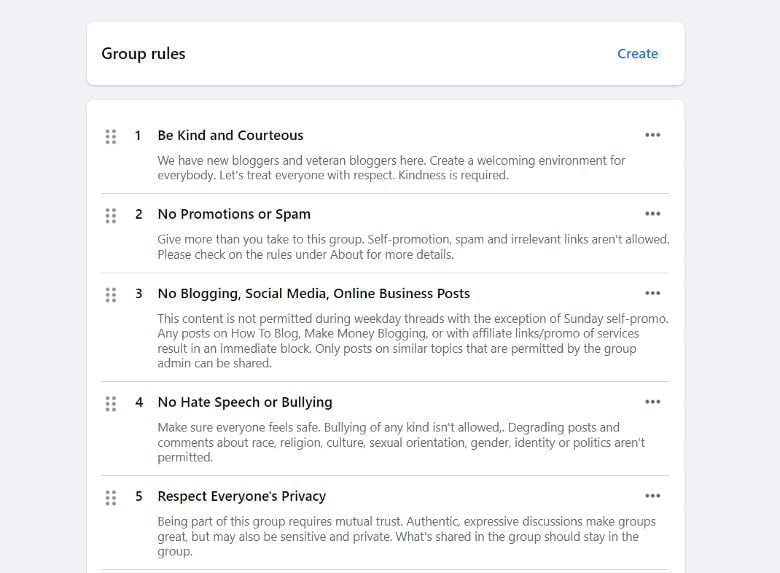
- Set your group rules. This you can do directly in your Facebook group. I also created a page on my blog that goes into specifics.

- Write your About section. Click on Group Settings from the left-hand menu and write about your group’s purpose, and yourself and include links to your site, etc.
If you need help writing your About section, look to your About Me page. If this needs help, I have a workbook for you right here:
- Set up by group’s branding. Choose the custom URL name, group colours, and who it’s affiliated with (your personal account or page).

- Create a cover image (1640 x 856 pixels) for your Facebook group. Choose a profile photo as well.
- Determine your role as an admin. What do you want people to see you as? Take into account personal branding.
- Plan what kind of content you’ll be sharing: questions, polls, tips & tricks, daily activities – also known as “threads”.
- Consider what kind of tools you’ll need. I’ve been using the screen capture software Loom in my Facebook group to give quick explanations and walkthroughs when I’m showcasing a solution or a product that I recommend.
PRO TIP: The term “threads” in Facebook groups refers to scheduled daily activities that give your community an opportunity share links. This works very well if you’re working with bloggers to promote their content. Facebook group threads are not to be confused with the new Threads app launched by Meta.
| RELATED: How To Get The Most Out Of Facebook Groups And Not Get Kicked Out
Launching Your Facebook Group
Now that you’ve got everything set up, it’s time to launch your group and attract members.
Attract new members by:
- Sharing your Facebook group with a social media post on your Facebook page, Instagram, Threads, Twitter, etc.
- Announcing it in your email newsletter
- Include a banner at the bottom of your blog posts inviting readers to join.
- Inviting anybody who signs up to get your newsletter freebie to join your group
Being present in the group is good business etiquette. Your members will happily promote your group to others!
| RELATED: How To Use Social Media To Promote Your Blog
Create Your Facebook Group Today
Even if you don’t plan on building it just yet, set up your Facebook group and set it as private.
This gives you time to do everything you need to do to launch it successfully.
Here’s that checklist of key activities for starting a Facebook group:
- Define your Facebook group’s purpose
- Identify the ideal Facebook group member
- Determine your Facebook group name
- Develop your group rules
- Create and upload a cover image and profile image
- Determine your role as group administrator
- Develop a weekly schedule of engaging content
- Determine what additional tools you’ll need to engage with members
Once you’ve launched, the fun part of growing your Facebook group begins!
Keep active in your group daily and you’ll see people recommending your group to others.
Remember to join my Facebook group: The Blog It Better Society
QUESTION: When you create a Facebook group, what’s it going to be about?


I don’t have a Facebook group but I have a page for my blog. This is some really great advice
This blog post has been helpful for me because I’ve been trying to create a perfect group since I’ve started blogging (for about 10 years) and I haven’t had the chance to successfully get members… I will use all your suggestions to start a new FB group for my blog, and I’ll tell you how it goes!
Thank you so much for this useful information ✨
Funny thing. I started a FB group about 3 years ago. I got up to about 400 people. And then I got discouraged. I decided to quit. (I had a tantrum, really.) And then I realized I made a huge mistake. By then, it was too late to recover the account. I started a new one. I am just now back to 400ish people. I learned a big lesson. No more tantrums!
Oh no! That’s kind of funny in a way – but good tip. No tantrums. Ride it out, right?
This was a great read. I’ve thought about starting one. If I did, it would be for women with fibroids.
That’s a great idea and there’s certainly an audience for it! I say go for it!
I love creating Facebook groups, I have a few for my home-based baking business and it works nice for people to connect with me after a purchase. but I struggle to keep it up to date with everything else going on.
I hear you! I’m working on a post on how to keep people engaged even if you don’t have too much time!
I created FB group a week ago and I have 5 members. I struggle with daily activity because it is hard for me producing so much content ( blog and 2 social media) But definitely I see potential in my group. I write movie reviews.
Some pre-planning will help! I batch my content in advance and schedule it in batches. It helps!
I’ve created many facebook groups when I was a political activist. This blog post is excellent for easily demonstrating how to set up a facebook group. I might be setting up a FB group for my blog when I start getting organic traffic, so the idea of setting it up ahead of time and setting it to private is a very good idea.
Glad you like the post – I like the idea of start it, and grow it when you’re ready!